Getting RenderMan shadow maps to work properly
Having found it really hard to get shadow maps working, I’m publishing the results of many hours trial-and-error here. Hopefully this might come up in someone’s Google search, and be helpful.
This article focuses on getting distant-light shadows to work, using the Pixie renderer. The techniques are quite different for spotlights and point lights. This also currently doesn’t work so well in the Aqsis renderer. It’s a fine renderer, so there must be something I’m doing wrong …
You need two passes: the first does the shadows and the second ‘beauty’ pass does the actual image. For this I’ve used two RIB files, though you could try and cram it into one by putting the two passes in separate frames. What follows are annotated excerpts from the shadow-pass RIB file.
Shadow pass
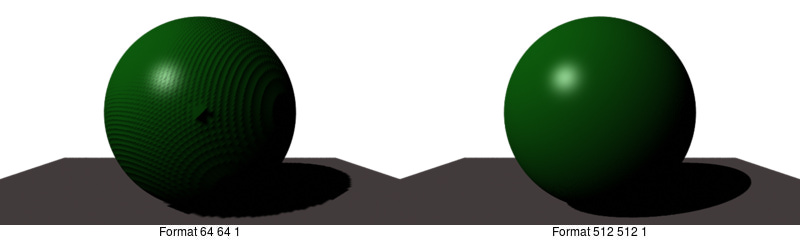
Format 1024 1024 1
This normally sets the width, height and pixel aspect ratio of the image. Here it’s for the shadow map, and the most important things are that it’s always square — regardless of your image size, and that the size is always a power of two. Bigger shadow map sizes yield better quality shadows, but are slower to render. It might be good to start at about 512×512 and work up from there to 1024×1024 or 2048×2048. For shadow maps you use square pixels, so the third parameter will always be 1.
Projection "orthographic"
This is vital for distant lights. Spotlights use a perspective projection for their shadow maps, but distant lights are always orthographic.
ScreenWindow -1 1 -1 1
This is also vital. The shadow map is always created in minus-one to plus-one screen window. I’ve read other advice that says to increase the size of the shadow map screen window if you’ve got a bigger scene to cover, but this never worked for me. Instead always leave the screen window at minus-one-to-one, and cover bigger scenes by using scaling.
Scale 0.04 0.04 0.04
This value will vary to suit your scene. Here I had to cover a large scene (about 160 units across), and by using a small scale value it indicates that the shadow map at the one-one screen window size represents a scaled-down view. If you only had a scene of one unit across, then your scale value could probably be one as well.
Rotate -37.985 1 0 0

Rotate -38.660 0 1 0

Translate 80 -100 100
These lines will vary from scene-to-scene, and are calculated to put the ‘shadow camera’ in exactly the same place as the light from your scene — pointing in the same direction. These numbers are often a pain to calculate by hand. There’s a C program available named placecam, which does it for you. I’ll post a Python version of this at some stage.
Display "shadow0001.depth" "zfile" "z"
This specifies that we’re rendering a depth map (or z-file) rather than a standard scene. In this case I’m rendering the first frame of an animation, so my file’s named “shadow0001.depth”.
Clipping 5 150
You save a lot of time, and make the shadow map more accurate if you get this line correct. The clipping numbers represent the nearest and furthest points from the camera, that need to be rendered. The default value is from the smallest number that can be represented, up to infinity. If the clipping values are tightly bounded to your scene then it’ll render much more quickly.
ShadingRate 4.0
This would be a lower quality shading rate for the final image (which should have a shading rate of 1.0 or less) but is fine for the shadow map.
PixelSamples 1 1

PixelFilter "box" 1 1

Hider "hidden" "jitter" [0]
These must always be “box”, one-one and no jitter. The shadow map relies on not using any sort of smoothing or sampling on the map, though the final image may have this.
WorldBegin
…
WorldEnd
Your scene’s geometry goes in here. This is the same as your final scene, except for:
- colours and non-displacement shaders have no effect on the shadows, so leave them out to save time (though if you leave them in nothing bad will happen)
- anything that doesn’t cast a shadow (though it may receive shadows), such as a ground plane — leave this out to save rendering time
- special effects … you can alter the geometry to end up with shadows where there’s no object or objects with no shadow — if you want to create an unusual effect
MakeShadow "shadow0001.depth" "shadow0001.tx"
The shadow map file that has been produced isn’t totally ready to be using in the final pass. It needs to be converted into a texture file, and this command does it.